A hands-on Blender experiment · By GPT Blender
I Turned a Floor Plan Into a Full 3D Model Using GPT-6 Astra in Blender — Here's Every Step
One floor plan, several iterations, and a warmer final home. Explore the BlenderKit result, its recorded build and the earlier attempts.
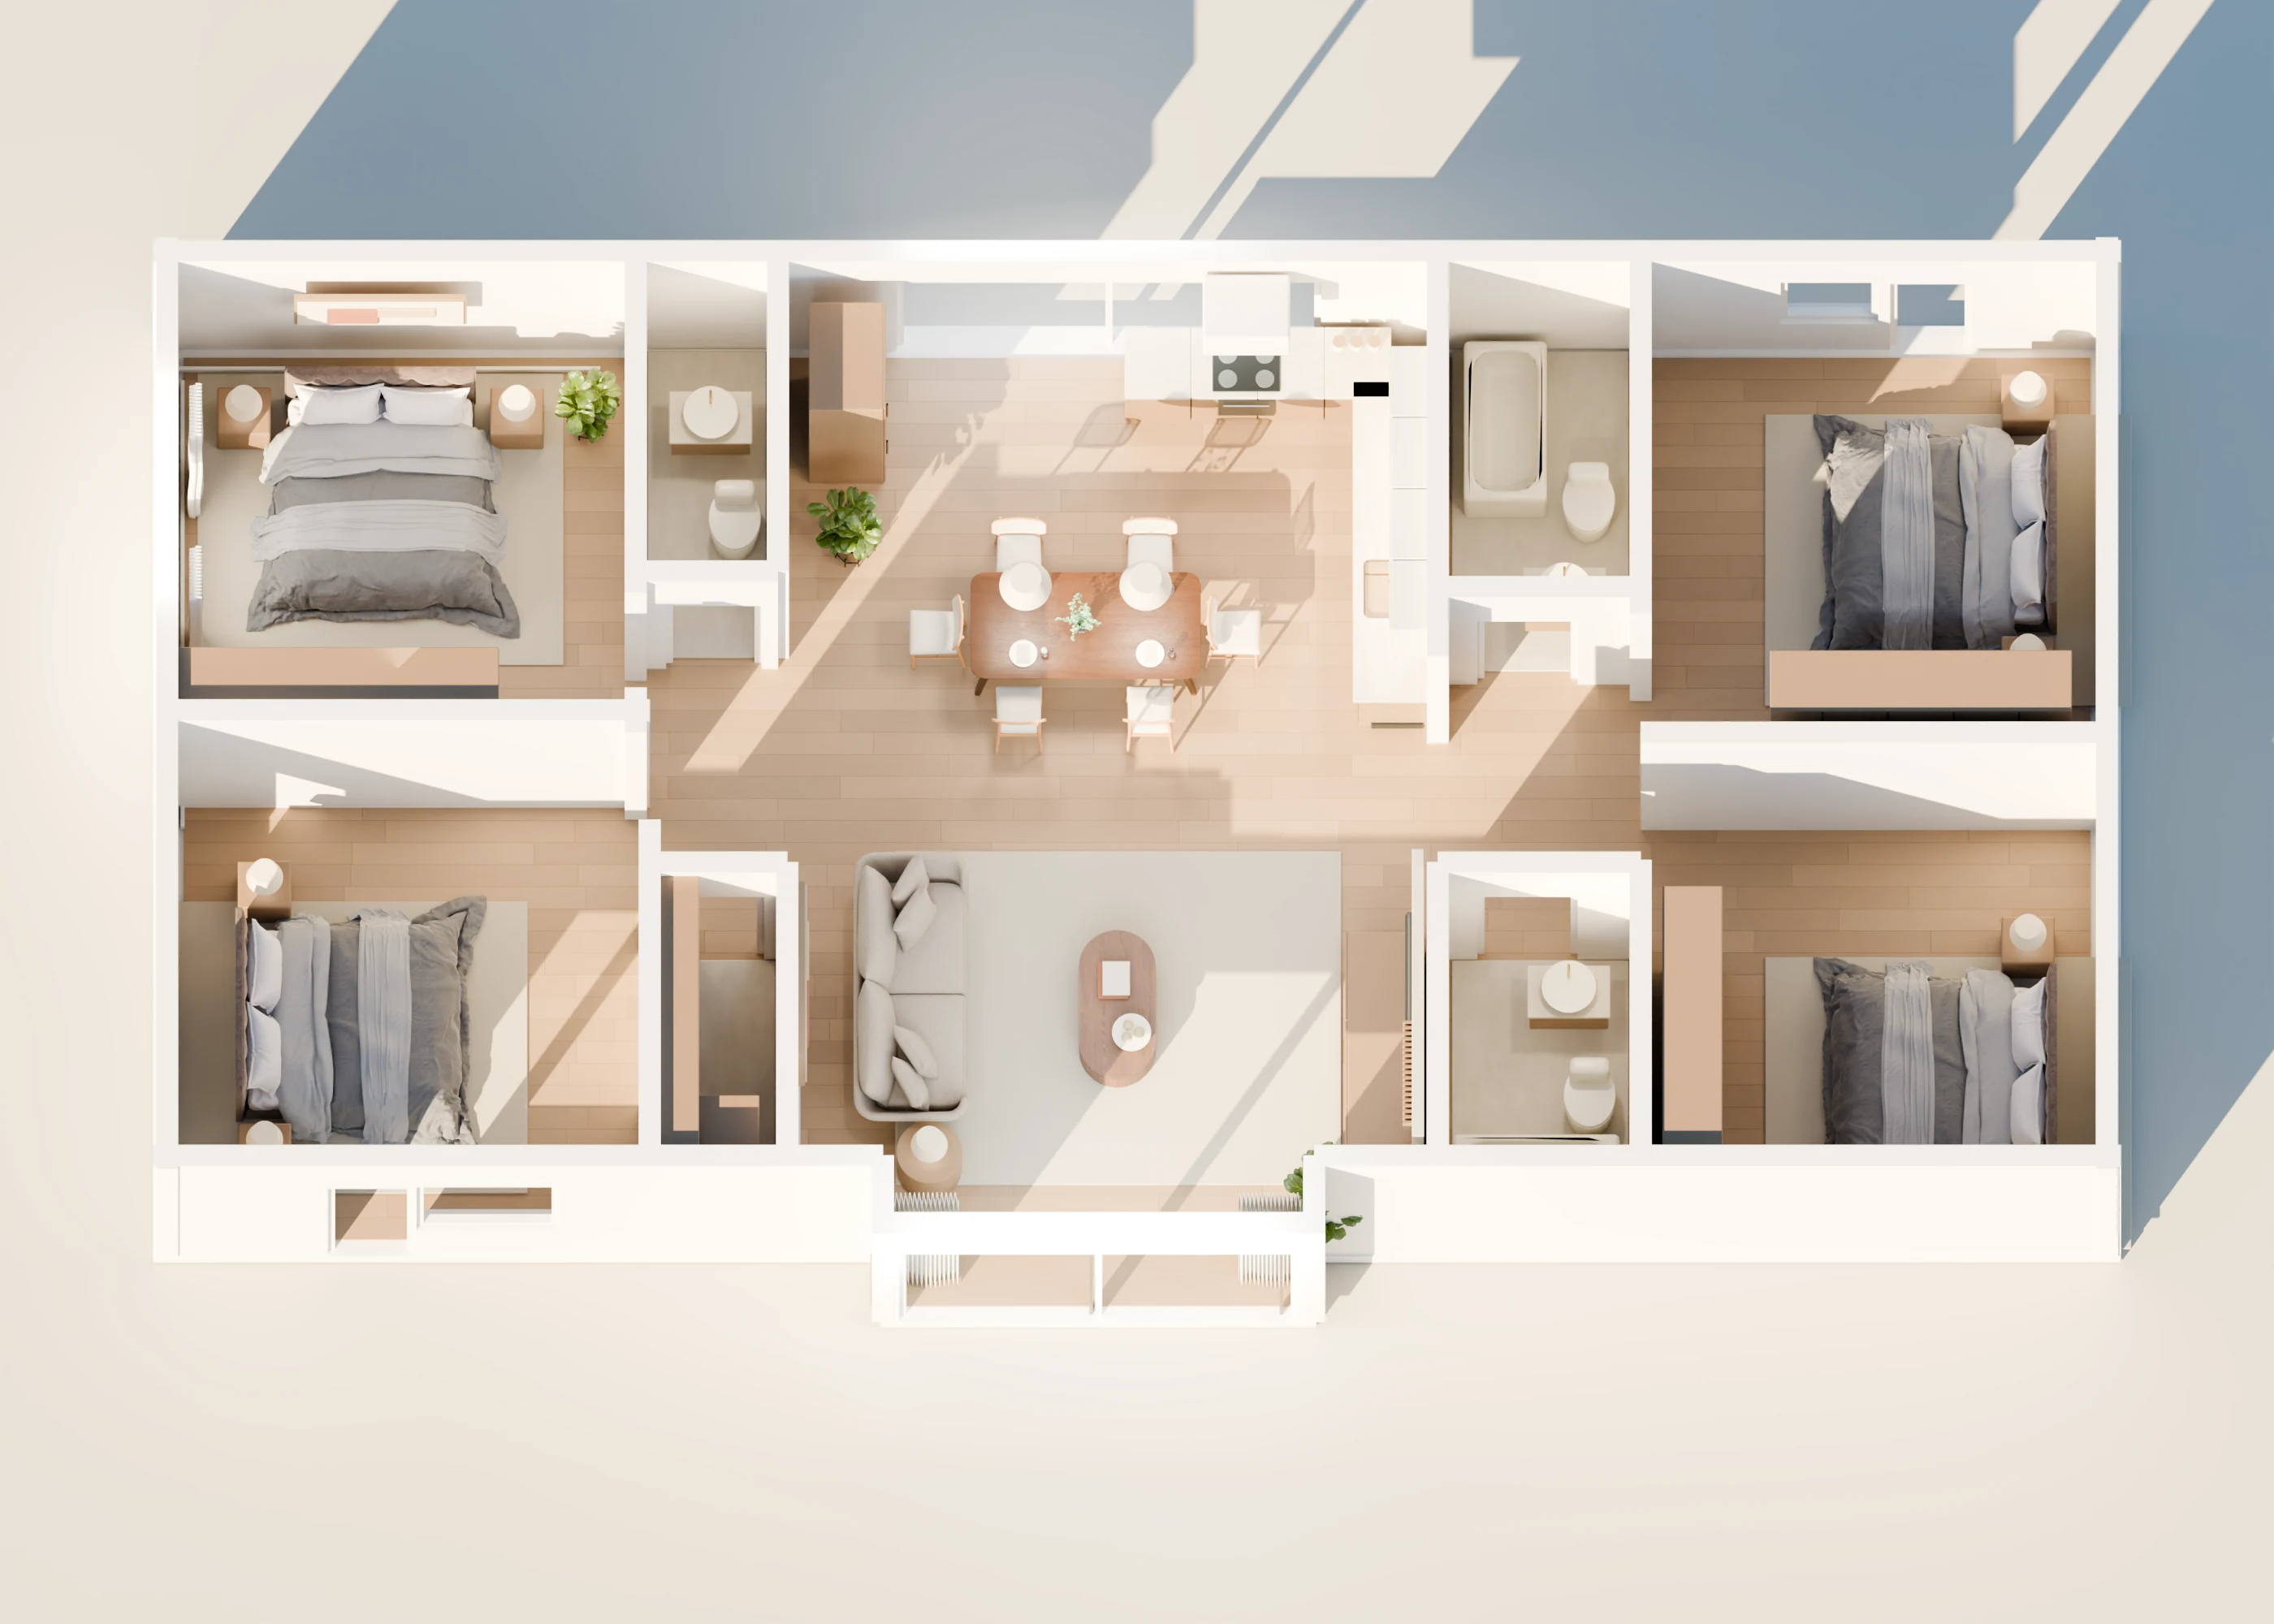
Walk through the build.
View four Cycles renders, orbit the furnished model, or replay eight recorded stages with 47 constituent operations.
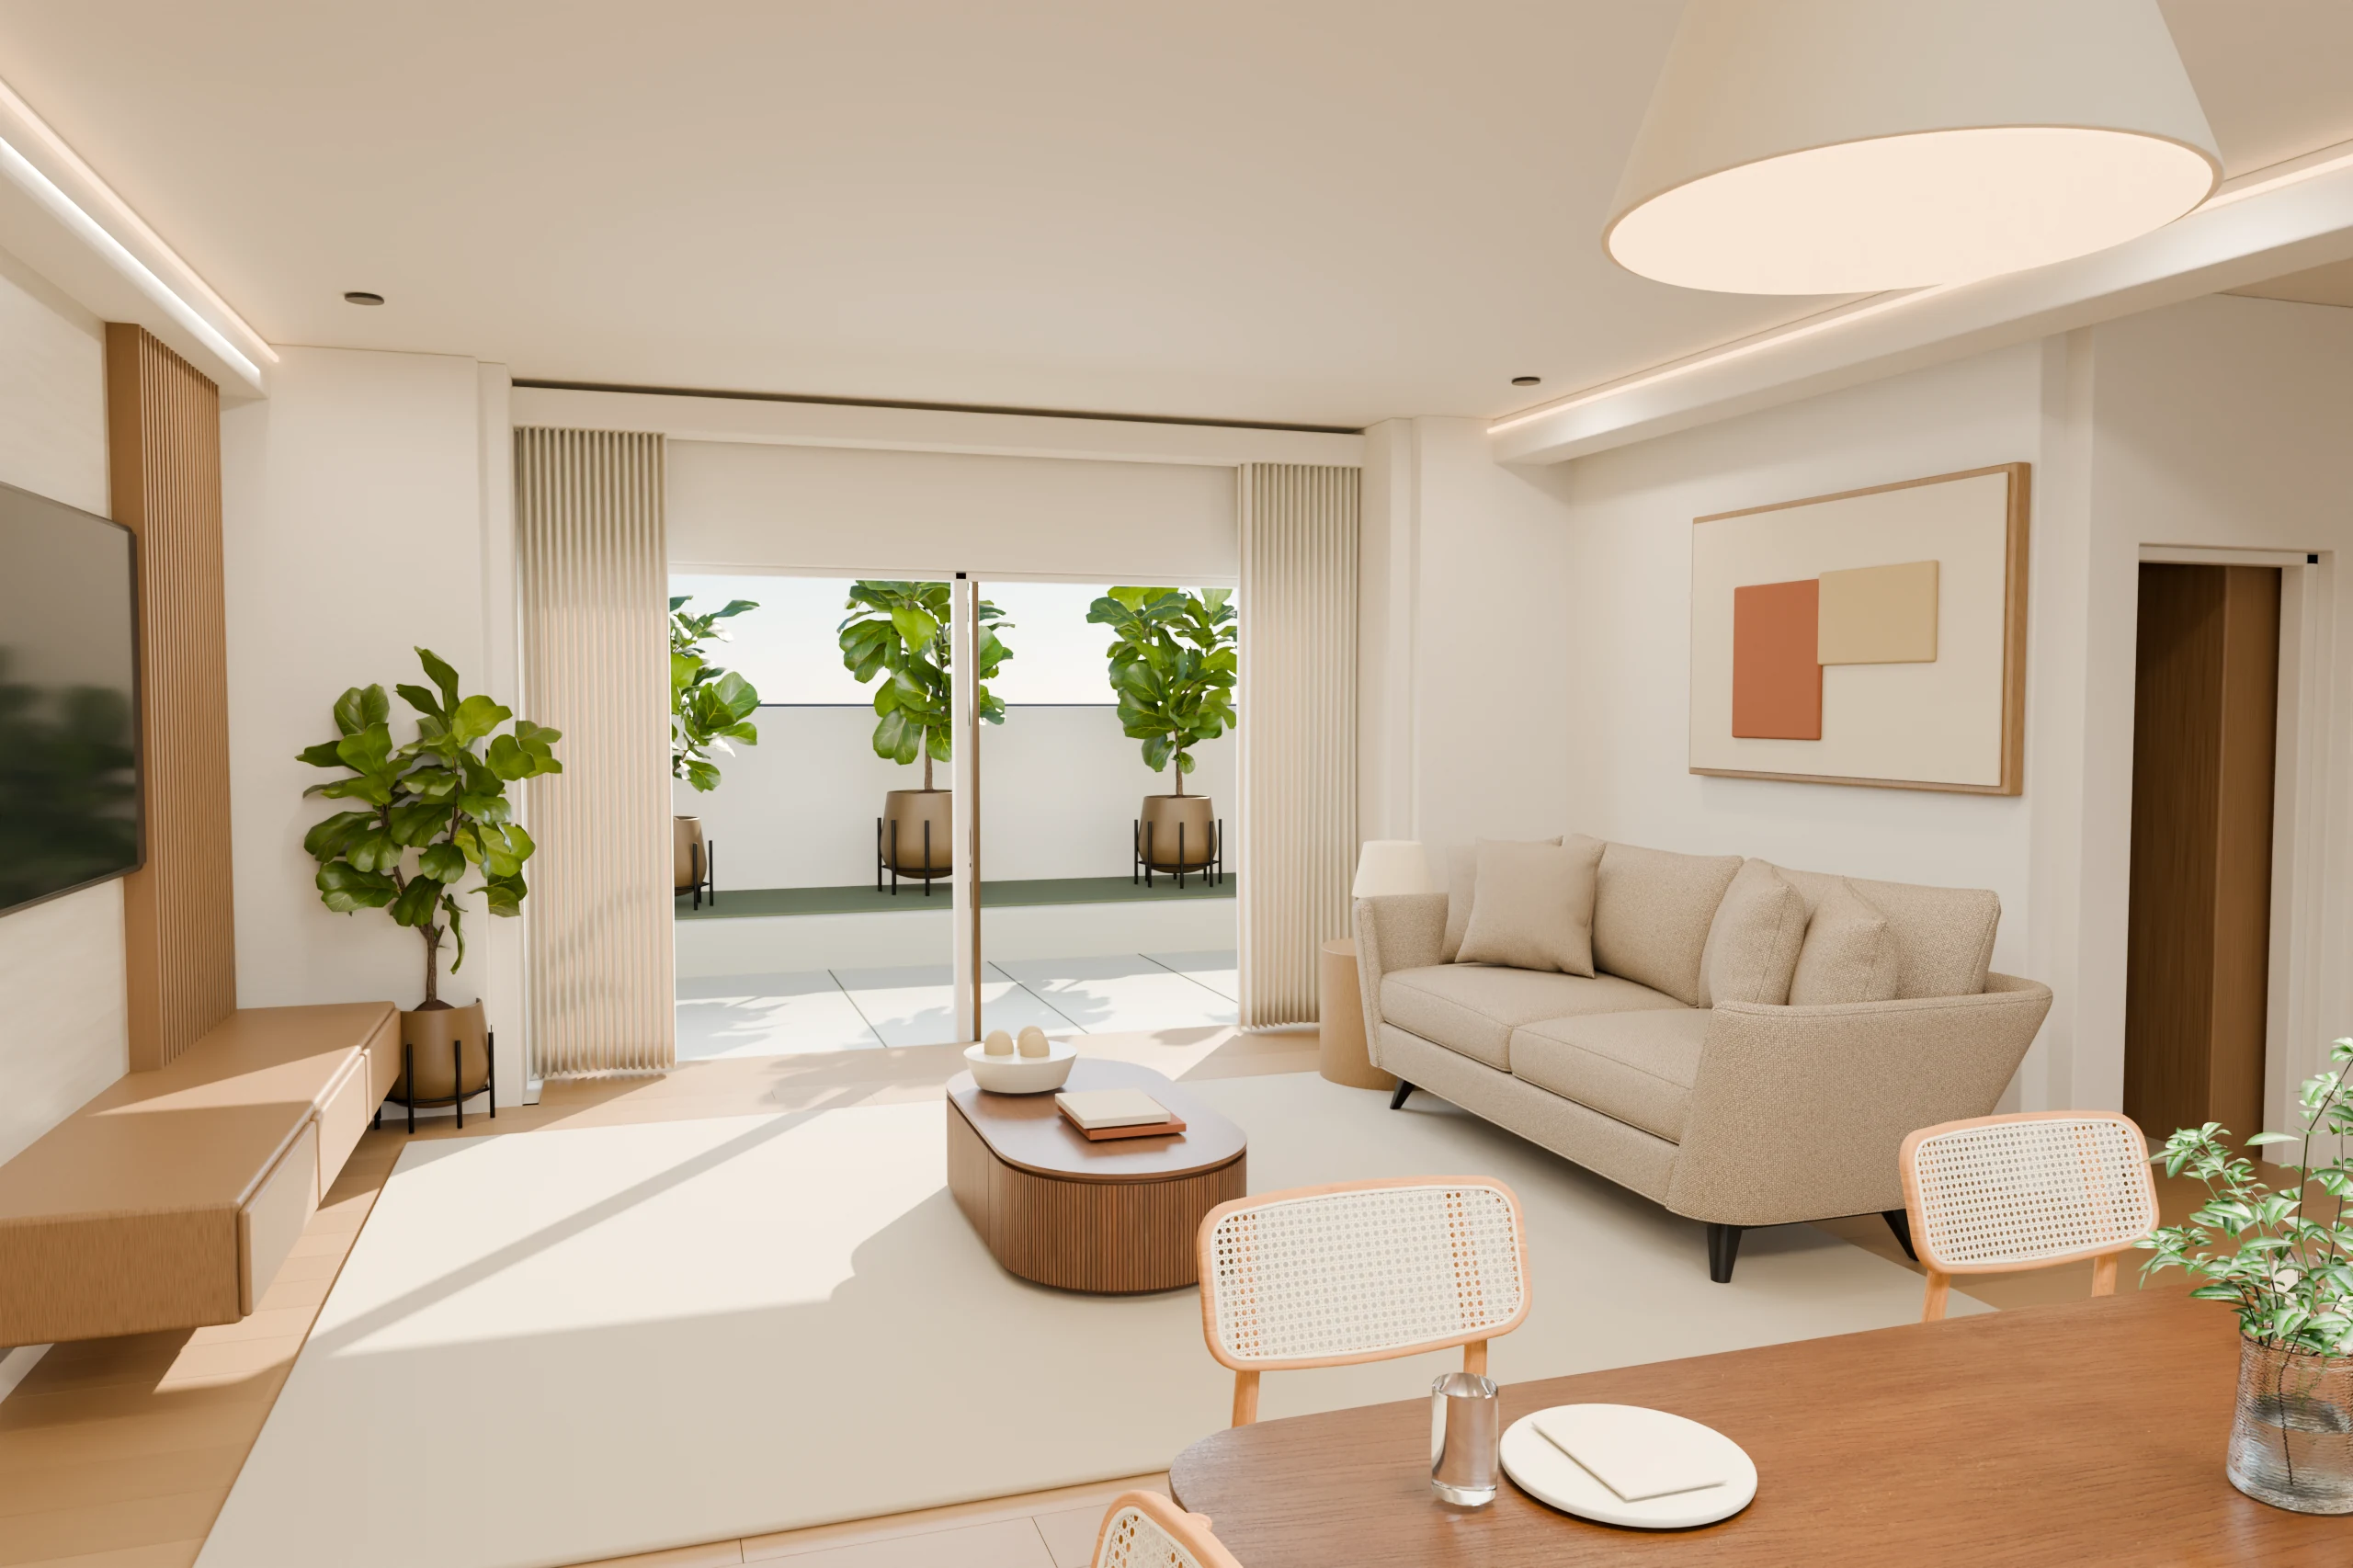
A model you can explore.
Open the four finished renders, then choose 3D model to explore the rooms or replay the build.
Loading the build
This replay reconstructs the reviewed BlenderKit design in eight real stages. The four original renders are preserved; imported-image events identify their checksums. Earlier attempts remain in the time comparison.
Download the model and inspect the build assumptions
Furniture sources and licenses- Layout follows the supplied four-bedroom, three-bathroom plan. Width 18 m and ceiling 2.9 m are design assumptions; dimensions need site verification.
- BlenderKit supplies six furniture asset types; asset-manifest.json records authors and licenses. All 40 image maps are packed in the original Blender file.
- The downloadable Blender file is the reviewed source. The browser companion uses lighter subdivision and portable PBR finishes; its lighting approximates Cycles.
- These eight checkpoints re-execute this BlenderKit design. The four reviewed Cycles renders are reused with checksums; their original rendering logs are retained separately.
Each checkpoint was exported from an actual Blender execution. These are editable meshes, not a projected picture of a room.
1. Get Blender ready.
Start a Codex task in a project folder, with GPT-6 Astra selected for this experiment. Keep the floor-plan image and the files you want it to produce together. Send this prompt directly to Codex:
Blender includes its own command-line interface. The aim is to make the Blender executable available to Codex; a separate rendering app is not required. Check that blender --version returns a version before continuing. This recording used Blender 5.2.1 LTS.
Blender’s command-line arguments explain how background mode and Python scripts work together.
2. Ask for a warm, modern interior.
Attach the image you want Codex to work from, then send the prompt below. This is the English translation of the brief used for the latest BlenderKit iteration:
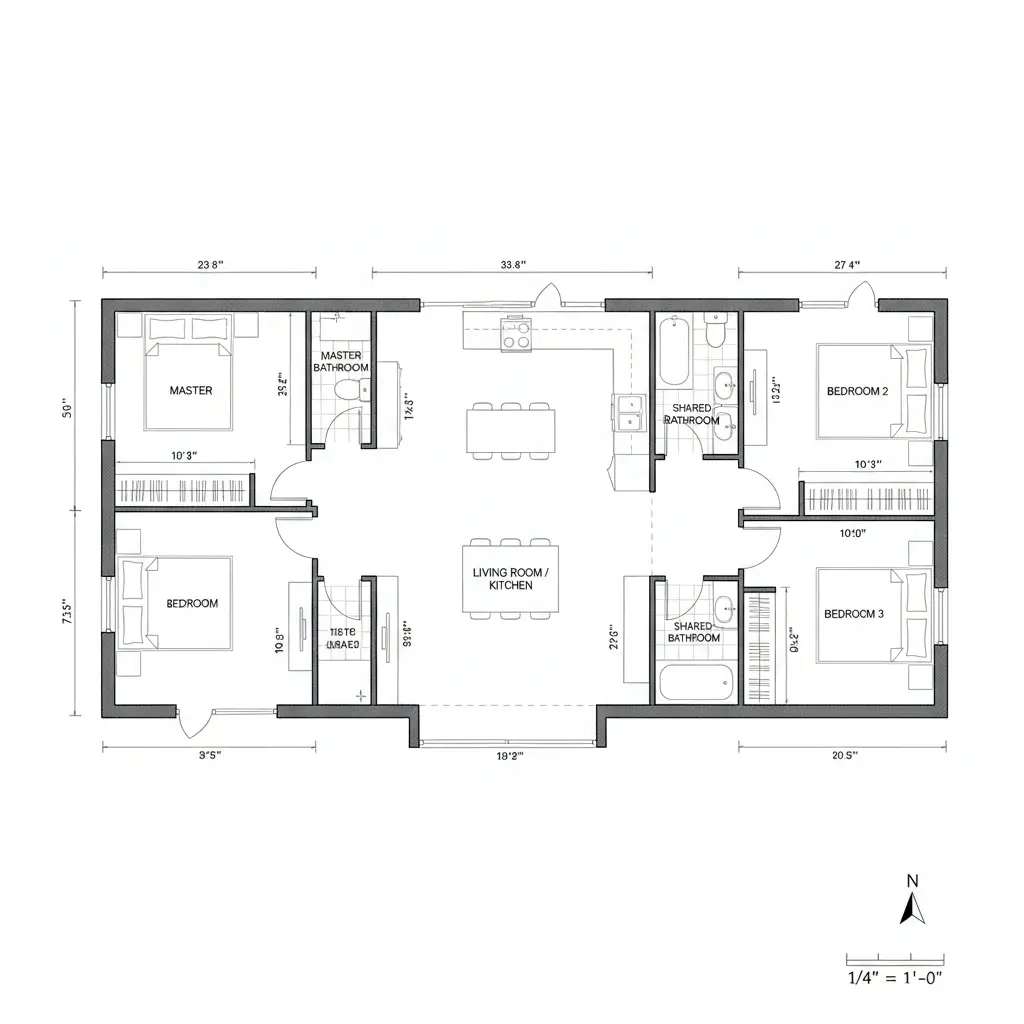
Use the Blender CLI to turn this image into a warm, modern home interior. The furniture and lighting should look realistic, and the render should be good enough to present to the homeowner. Use furniture assets from BlenderKit; I have already installed it.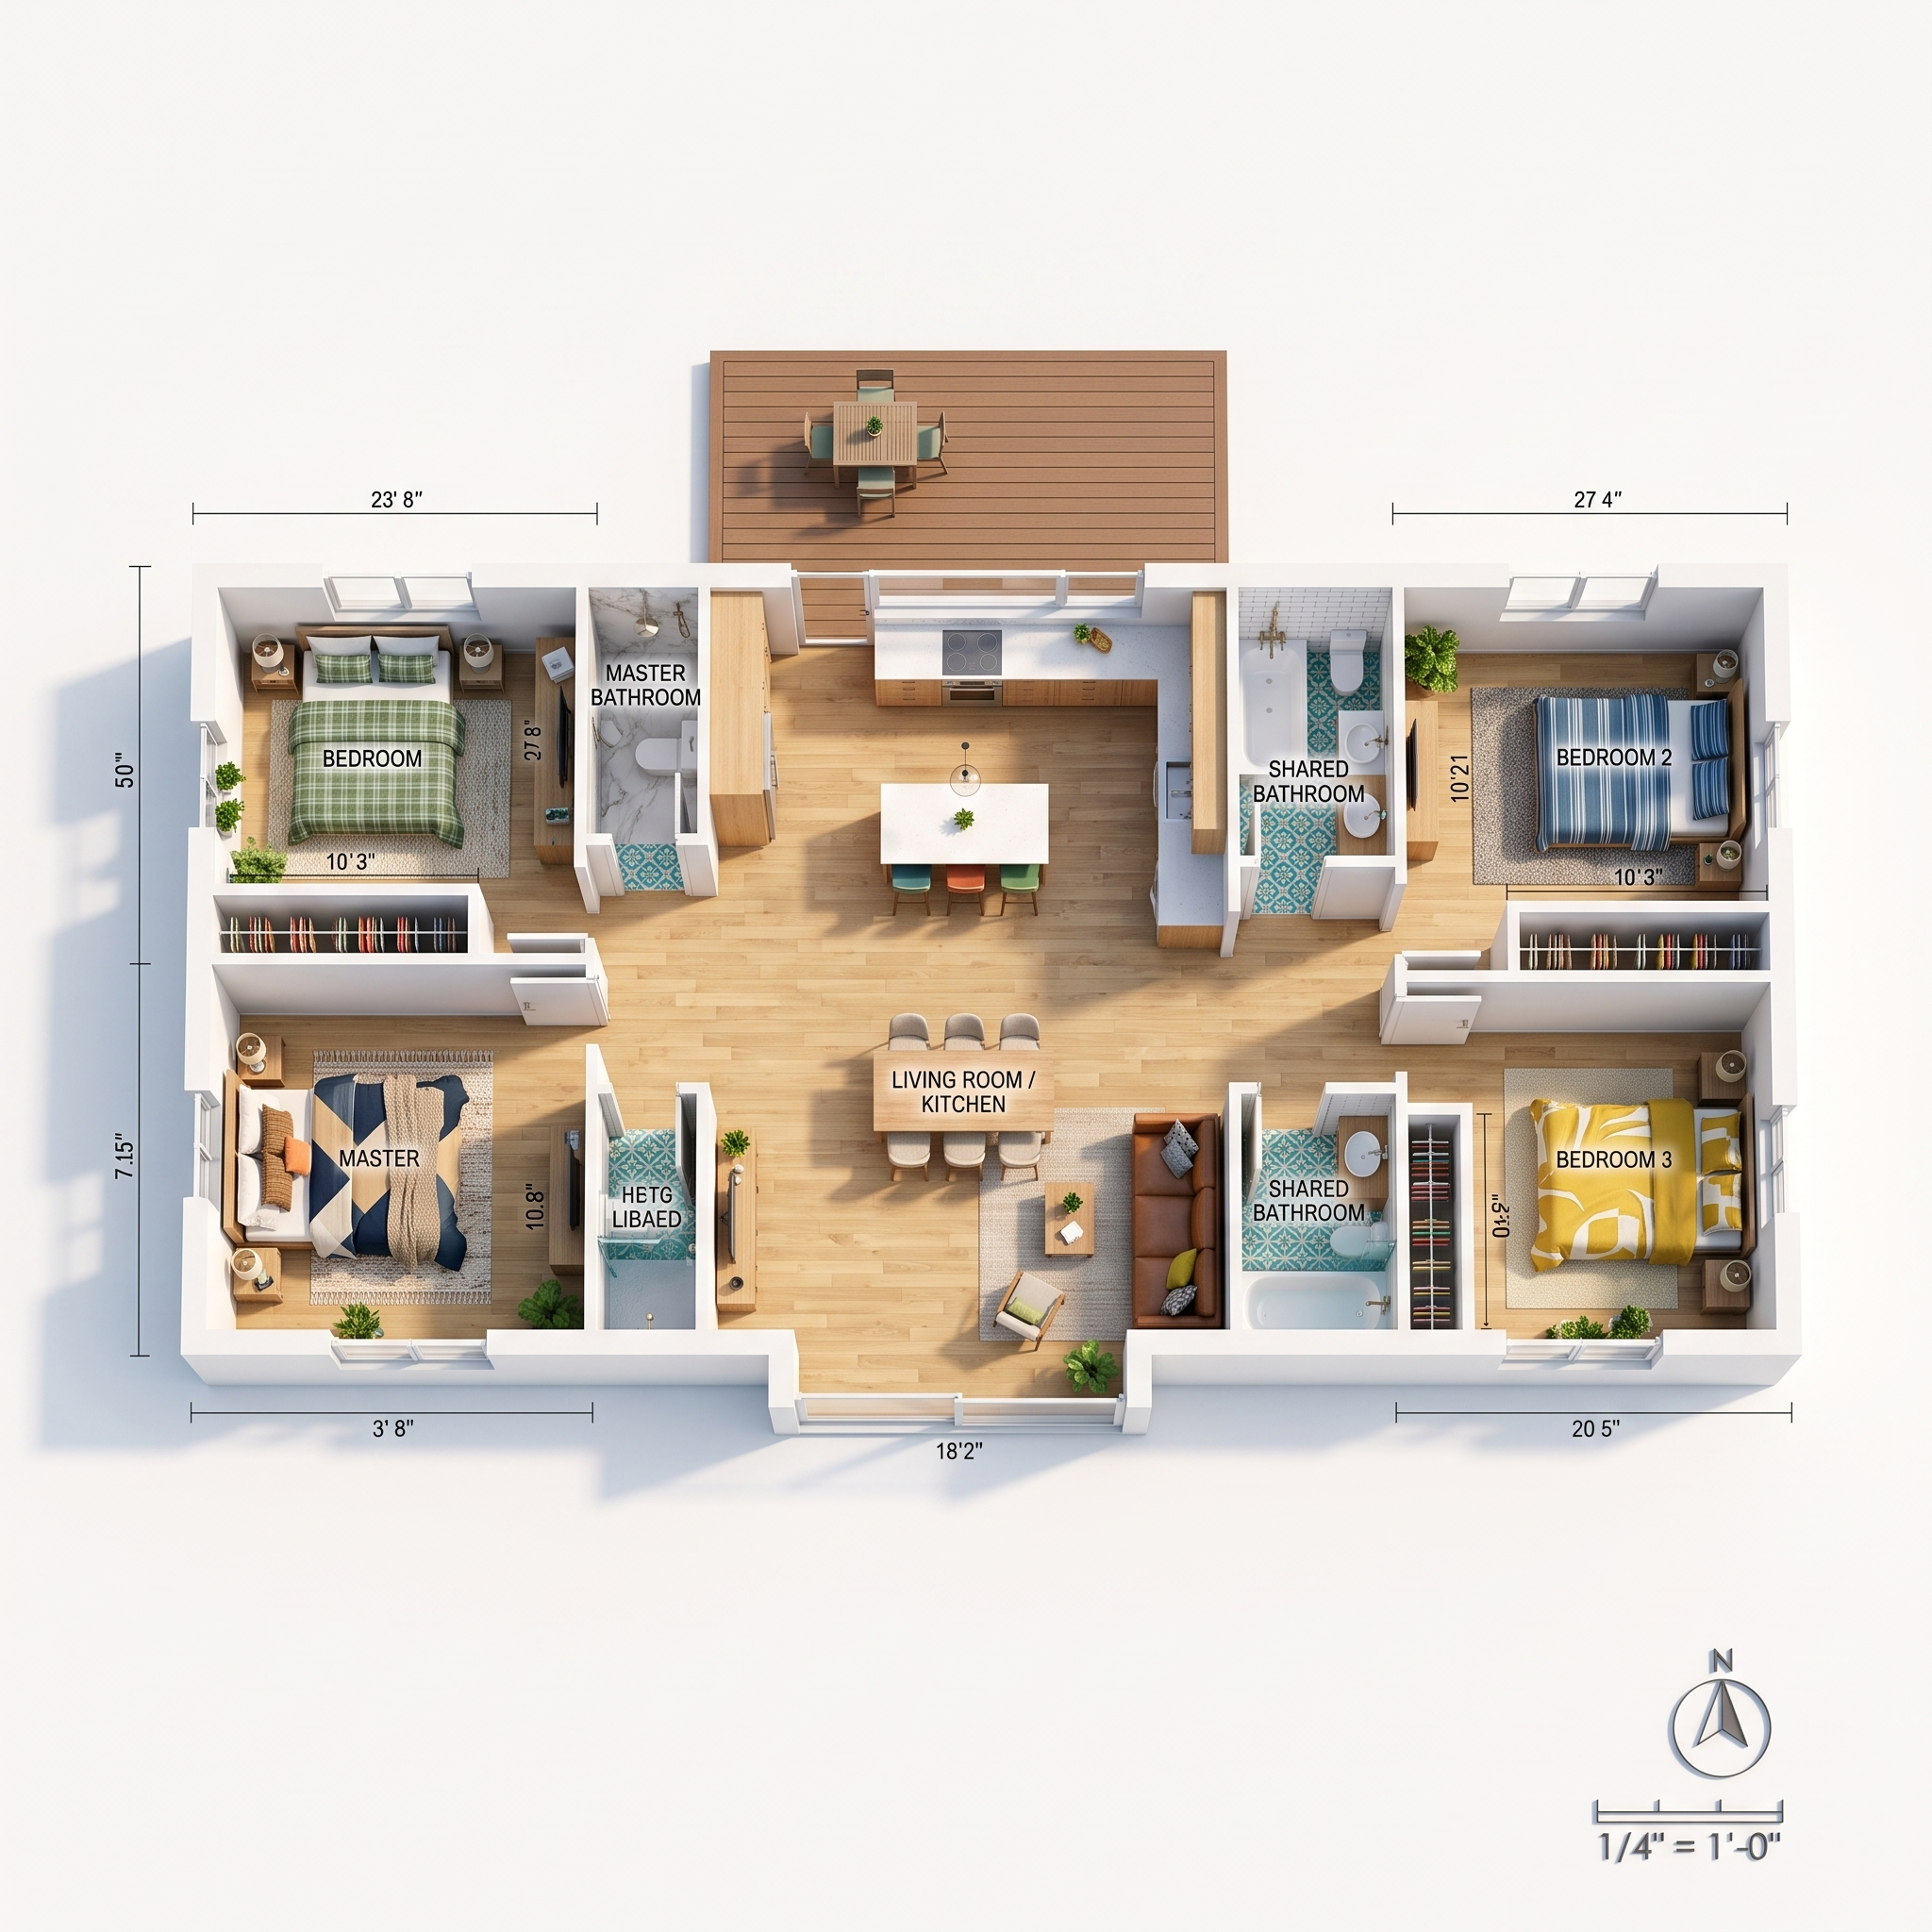
“Good enough to present to the homeowner” was the target. The latest result above uses BlenderKit furniture and offline Cycles lighting. The earlier results below show why additional work was needed.
3. From the floor plan to a furnished model.
Supply the floor plan as the layout reference and install BlenderKit for the furniture assets. The latest recording has eight major stages, containing 47 operations. Each stage has its own geometry snapshot, executed code and measured duration. Use the links below to inspect its before and after states.
-
Stage 1 — Traced the plan and built the shell
The four-bedroom plan is reconstructed at an assumed 18 m overall width and 2.9 m ceiling height. Full-height walls, real openings, window frames, individual oak boards and pleated curtains establish the spaces.
-
Stage 2 — Fitted the oak kitchen
The L-shaped kitchen gains oak fronts, stone worktops, a recessed sink, brass faucet, integrated appliances and task lighting. These details remain editable geometry in Blender.
-
Stage 3 — Furnished the living and dining area with BlenderKit
The script imports the Taipei sofa, fluted coffee table, walnut dining table, six Netro chairs and ficus plants. Rugs, media joinery, pendants and table settings complete the shared room.
-
Stage 4 — Dressed all four bedrooms
Four BlenderKit beds add draped bedding to the bedroom layout. The script places bedside tables, lamps, rugs and wardrobes, then refines the master-bedroom curtains and wall relief.
-
Stage 5 — Fitted the bathrooms
Limestone floors, floating vanities, vessel basins, brass faucets, hollow baths and toilets furnish the three bathrooms. The south bathtub receives its final orientation correction in stage eight.
-
Stage 6 — Set daylight and four cameras
The scene receives sky illumination, aperture lighting, ceiling bounce and four review cameras. Cycles, CUDA and AgX are configured, and texture images are packed into the editable scene.
-
Stage 7 — Refined light and framing
Garden views, exposure, bedroom framing, flush skirting and lamp glow are refined together. This stage checks texture packing and the imported furniture instances.
-
Stage 8 — Reviewed walls and room layout
Overlapping architectural junctions are joined, the south bath is rotated to match the plan, and laundry storage and appliances are fitted. The reconstructed final layout matches all 752 objects in the reviewed Blender scene.
For a saved Blender scene, the official command-line rendering guide shows how to produce a still without opening the interface. The browser replay uses a GLB export; Blender’s glTF documentation explains the material differences to check after export.
4. What 10, 25 and 50 minutes bought me.
The layout appeared quickly. A convincing finish took more work. These are my approximate time notes for three versions, not controlled benchmarks or times to add together.
| Version | Approx. time | What I got |
|---|---|---|
| White model | 10 min | A readable layout and basic furniture|
| Color render | 25 min | A furnished home, but still cartoon-like|
| Realism pass | 50 min | More detail; some cartoon-like qualities remain
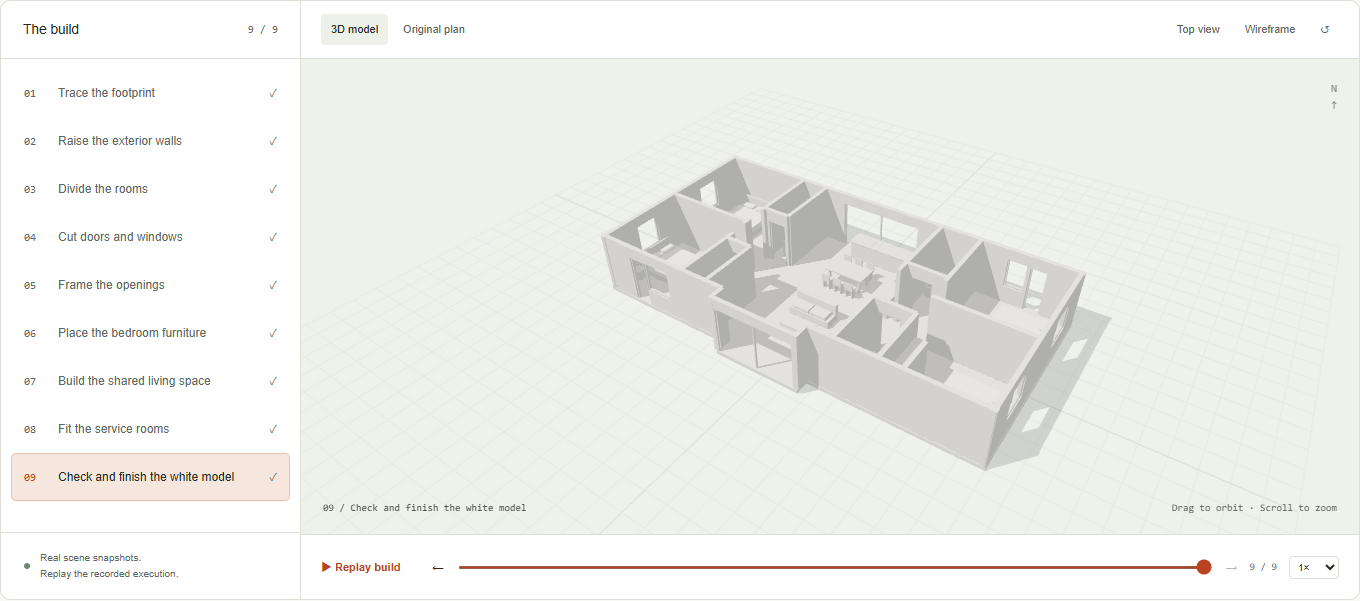
About 10 minutes: the white model.
The white model was enough to inspect the rooms, openings and furniture placement. It gave me a useful first result before materials or lighting became the focus.
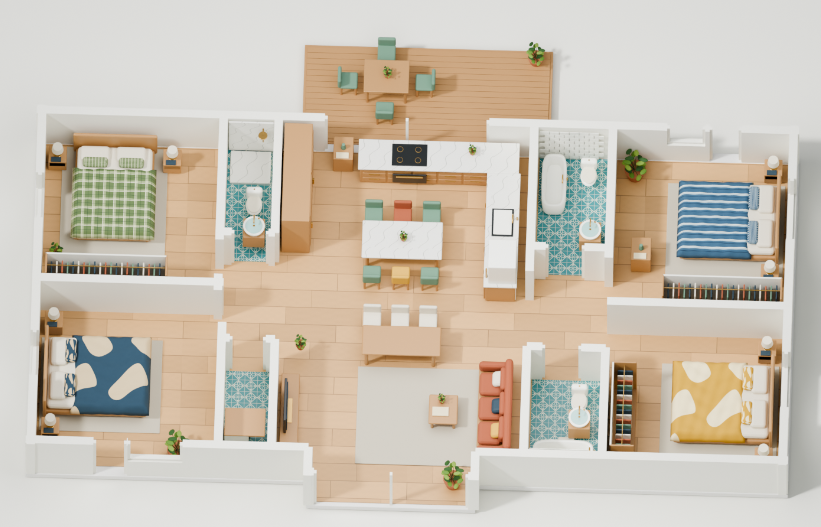
About 25 minutes: color, furniture and light.
The wood floors, patterned fabrics and bathroom tiles made the house feel much more complete. The result was still a little cartoon-like; adding color had not automatically made the furniture and lighting realistic.
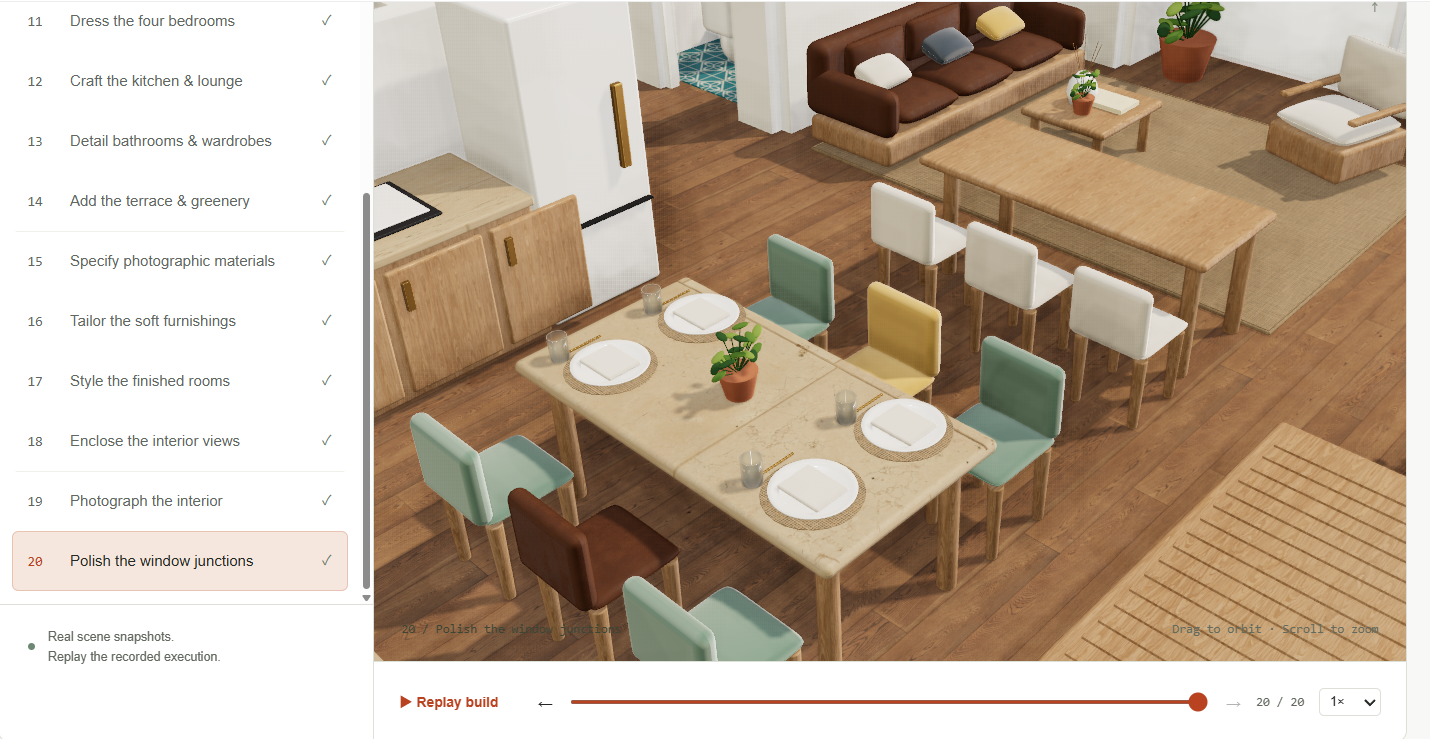
About 50 minutes: closer, with work still to do.
The later pass pushed the wood grain, furniture and tabletop details further. It still retained some cartoon-like qualities. This screenshot is evidence of that later pass; it predates the latest BlenderKit replay on this page.
The pitfalls I would check again.
- Assumed dimensions. This build estimated the overall width. A convincing render cannot validate those measurements.
- Reference drift. The terrace came from the style reference. Compare the finished layout with the floor plan before accepting additions.
- Detail versus realism. More objects and textures improved the scene, but did not fully remove its cartoon-like appearance.
- Different views, different impressions. The later screenshot uses a closer camera. It is a useful progress record, not an identical-camera quality benchmark.
Timing note: the latest eight-stage reconstruction reports 320.1 seconds, including snapshot export. Its preserved Cycles render commands took 804.7 seconds combined. Both measurements are separate from the earlier end-to-end 10 / 25 / 50-minute notes above. Token usage and a complete failed-attempt count were not recorded in the supplied evidence.
5. Frequently asked questions.
How can I convert my floor plan into a 3D model?
Start with a clear floor plan and at least one known measurement. In Blender, establish scale, trace the footprint, raise walls, and cut doors and windows. Add furniture, materials, and lighting after checking the layout. GPT-6 Astra can help write the Blender scripts; you still need to review dimensions and the rendered result.
What app can I use to turn my floor plans into 3D models?
Blender is the app used in this walkthrough. It creates an editable 3D scene, renders still images, and exports a model for the interactive preview. Codex with GPT-6 Astra helps generate and run the scripts. You supply the floor plan, explain the intended style, and review the output as the model develops.
More GPT-6 Astra Blender demos
See how the same tools have been used at a different scale in our architecture roundup.
Sources & build evidence
- Blender Manual: command-line arguments
- Blender Manual: rendering from the command line
- Blender Manual: glTF 2.0 export and materials
- The recorded eight-stage BlenderKit build
- The Blender Python recording source
The time estimates and three progress images are from this experiment. The walkthrough describes the saved model checkpoints; the later screenshot is retained as a separate result.